Sunday, 22 January 2017

Crimean War Black Powder Game

Bob, Jack and I met for our first game of 2017, a Crimean War Black Powder game based around the Battle of Alma scenario in the rule book.

The rules suggest a 9'x5' table.  I have 8'x4' and the unit numbers we used were smaller so with a bit of messing about it sort of worked from an initial dispositions point of view.  We also reduced movement and ranges to 50%.  

All the figures are Minifigs S Range originals or recasts together with some of my own conversions.

The British initial dispositions

Scots Brigade
  1st Light Brigade
Guards Brigade
 The Russian positions

Russian small redoubt 

Large redoubt

Russian Centre
  

 Jack and I were going to command the British and Bob the Russians.  However I was quickly substituted by 'the Duke' (half of Kitten Force - or Brute Force as they are going to be renamed given their size now!)


Jack gave him charge of the Scots and Guards Brigades.  The Duke them went on a recon mission including trying to intimidate the Russian's C-in-C.


Having had a further look and passed on his finding, the Duke retired and the game started in earnest.

Basically, the Russians are fighting a defensive action and there wasn't much for Bob to do except decide when and where to bring on this 2 brigades of cavalry who were off table..  


So I took the initiative and advanced my Brigades.  The Guards got off to a slow start.


Bob moved one of his 2 Cavalry Brigades consisting of 2 regiments of Cossacks and 2 regiments of Light Dragoons onto the table to the right of the large redoubt.  As a safety measure I moved both of my regiments into squares.  We debated in fact whether given the British were armed with Minnie rifles they would have bothered and whether they would have just shot the Russians away.


I moved forward the Heavy Brigade and with 3 command moves they raced across the table towards Bob's cavalry. 


The Light Brigade brilliantly rolled a double 6 and took a 'Blunder Test'.  Fortunately,  it resulted on one move to the left, not so desperate!

Bob's guns started to take their toll with hits on the Rifle Battalion who were in a square and on the advancing British Guards


The Heavy Brigade took the initiative charging into the Russian cavalry. The Scots Greys ripped into the opposing Cossack unit causing them to break whilst the Dragoons could only pull off a draw.


The damage had been done with the Cossacks breaking and the supporting unit also having to fall back. The Scots continued their sweeping advance hitting the light dragoons, pushing them back and off the table into oblivion!

On the left Bob's other brigade appeared........


.......threatening the Guards.


Despite this, things looked to be going quite well, my artillery were starting to counter battery the Russian guns in the small redoubt, managing to inflict casualties and disorder on of the guns.

But Bob took the initiative and brought forward his Russian columns to inflict punishment on the Scots Brigade. He managed to flank them ....


they held despite overwhelming odds but eventually one battalion broke and fled the field.


In the meantime the Light Brigade managed to save the day by sweeping across the table and crashing into the rear of the flanking Russians and the rear of another regiment. These 2 Russian regiments performed heroically managing to survive the first Break Tests


The Heavy Brigade took some heavy punishment from the infantry regiment in the large redoubt with the Scots Grey's being wiped out. But my infantry charged forward and thanks to some very pour closing fire swept into the redoubt.  The Russian Infantry were distracted by the heavy cavalry who rallied and charged. The Russian infantry failed to stop them and combined with the infantry assault suffered horribly as a result.


At this stage, with one gun in the small redoubt still firing and his other cavalry brigade in tact we call it a partial victory for the British.  For my part whilst I had some good results, I felt that the table edge end of the world was a real problem for the Russians.  There also wasn't a lot for Bob to do except roll dice which, to be fair, didn't go well for him and probably contributed to my partial victory.  

The scenario/game gave high command thresholds to the British which meant I was able to move and command my troops better than the generals of the time.  The problem with a low command threshold, which might have reflected the quality of generals at the time - certainly the British - would probably have meant long periods of inactivity as we tried to get scores below 5!

Anyway, it was nice to get the figures out. The redoubts were homemade with air dry clay, coffee stirrers and Perry plastic gabions.  For the eagle eyed, the Priest in blue blessing the Russians is a not so good conversion I made from a Russian Guard Infantry Officer. I am going to remake this and am determined to do better!


Wednesday, 18 January 2017

S range Sardinian General - yet another conversion!

I saw this picture and was inspired to have a go at making a general for my Sardinian contingent.


I thought he looked like a Hussar with a Kepi.  My original thought was to use the head of the French Crimean War/FPW general on the body of a British Hussar Officer.  It turned out that I didn't have a spare head and being too lazy to set up my melting pot to cast one figure, I settled for the head of a Silesian figure I had left over from an earlier body/head swap.  I cut of the small pommel and it left me with a creditable head with a kepi.  Then it was a simple drill and glue to produce this figure.  I decided to leave the sabretache.


Not the best, but he will do for now. 

I promise this isn't just turning into an S range conversions site!  Hopefully, my cold permitting, Bob, Jack and I will be meeting for our first game of 2017 this week - err Crimean or Franco Prussian with - err - S range figures - oh dear! 

Friday, 13 January 2017

72nd Foot - S range conversions - Command and Musicians

No games because of the holidays and clashes with other things so instead I have been painting new units for my Crimean War army and reorganising others.  I have also been busy with converting figures and slowly getting the 72nd Regiment together.  These are some of the command.


This has to be my favourite conversion to date it is a straight head swap, and a bit of rubbing down with wet and dry sandpaper to remove the extra shaping on the cap of the FPW figure to get a sort of 'Glengarry'. 


 Highland Piper and a FPW Grenadier of the Guard head swap.


Produces a 72nd Regiment of Foot Piper who paints up rather smartly. I think I should have tried for a 'groove' down the centre of the cap.


The pictures I have seen of the 72nd foot Buglers show them in a white tunic. I wasn't sure if this was a 'dress/undress uniform' or not so, I have painted him in a red tunic. It was a simple conversion using the British light infantry bugler and a straight head swap from the Highlander advancing pose.  


The drummer again is a simple head swap.  Although I was asked by John Cunningham to make this conversion and had in fact already made one, I can't find any reference to the drummer wearing 'trews' rather they seem to imply that they wore a kilt. 


I haven't given the standard bearer a plaid as the original standard bearer in a kilt doesn't have one. Not sure is this is right?


Not sure I have got the plaid right but this was my second attempt and things weren't getting any better!


Sunday, 8 January 2017

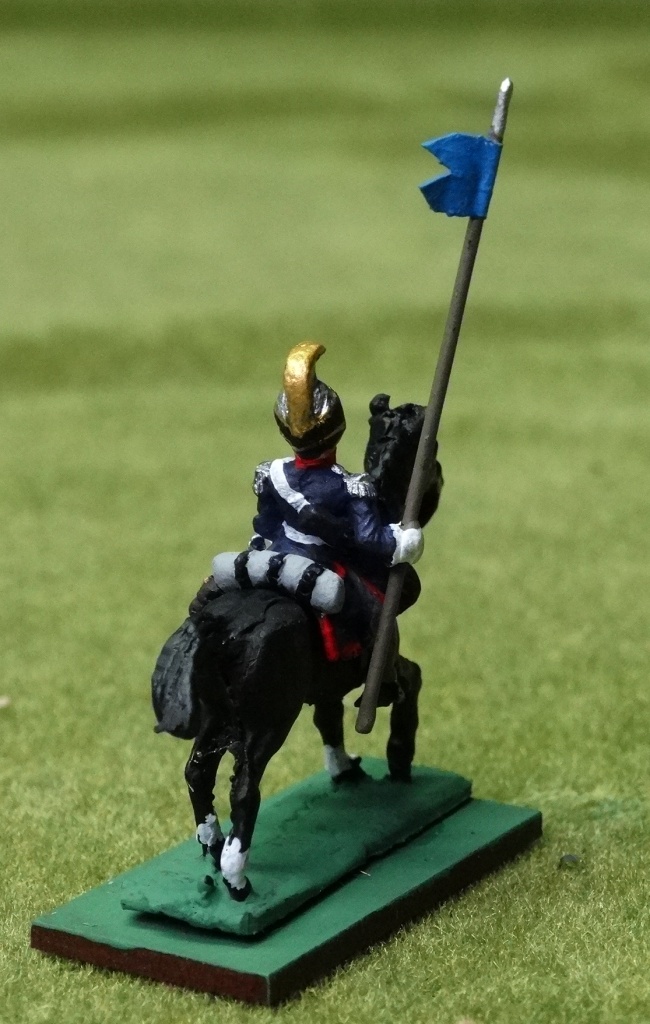
S Range Sardinian Lancer Conversion

I liked the look of a Sardinian Lancer in a helmet for my Allied Crimean War forces, so set about converting a FPW French Dragoon.  The figure would also work as a  Lancer for the Italian Wars of unification.

No head swaps on this occasion, just a scalpel and a bit of 'wet and dry' sand paper and a pair of thin nosed pliers. Slowly cut away the horse hair and then clean it up with the sand paper. Then using the pliers just bend over the end of the metal 'comb' that is left once the horse hair has been removed.  The cut off the musket and drill through the hand an insert a brass rod.  


I also tried the same conversion using a Carabineer, but I think both the helmet and the  crest are too high, although the horse furniture is nearer the mark.


Unfortunately the website 'An Illustrated History of Ottoman Uniforms & Insignia 1600 till 1923 http://www.ottoman-uniforms.com/ has been revamped and whilst still a superb port of call for information on Ottoman uniforms, all the pages which used to appear on the site about Sardinian uniforms in the Crimean War seem to have been deleted.  These pages used to carry some excellent illustrations by C Flaherty on of all branches of the Sardinian Army in the Crimea, including the lancers shown above, a very real shame and a loss. Hopefully these pages will reappear again.

Monday, 2 January 2017

Battle of the Bridge. A Thirty Years War Pike and Shotte Game

Our last game of 2016. We fought the battle at Bob's using his figures and he helpfully wrote up this report of the game for our blog.

This game was based on the mercenary captains’ campaign in the Pike and Shotte Devil’s Playground supplement. Three mercenary captains each leading a brigade must fight a series of battles on their way to meet their employers. The first is to take and hold the only bridge over an unfordable river.

Alan took the part of Officer Ensign Hakan Nilson Skytte, the senior officer of the three Swedish Protestant captains – I was the Catholic German Fullkwin von Brunn. The three brigades on each side were diced for and each was different.

The table was set up by random dice throw. 


Alan won the imitative (all captains were rated 7) but failed to get any of his 3 brigades to move. I managed to get 2 of my brigades onto the table and my dragoons raced to the bridge and dismounted ready to fire at any one coming from Alan’s side.


 followed by German infantry


.


Alan was now able to bring his troops on and deploy his guns


He ordered his Swedish Cuirassiers to gallop over the bridge 


They smashed into my dismounted dragoons who fired and then evaded.  


Since the Cuirassiers had outstripped their officer and troops they found themselves losing the melee because my troops were supported and they were alone. They had taken a casualty from my artillery when they crossed the bridge. The Cuirassiers fell back to the centre of the bridge.


My artillery forced them off the bridge and Alan's artillery did damage to my German troops enfilading the brigade and breaking one of the regiments. 


Meanwhile other units on both sides moved up to the river’s edge but could not cross


I had positioned my gun on a hill within medium range and nothing could come across without taking casualties. No units could cross the river at any other point, and everyone was reduced to firing across the river at their enemies. Individual regiments took casualties but since they could not cross the river they had no real effect. Except for Alan's units of peasant's who having stood and taken three rounds of fire eventually failed a moralke test and broke.


The object of the game was took take and hold the bridge and with no other way to cross the river the game became bogged down. Alan tried to take the bridge by attacking with his pikes


I met him on the bridge with my pikes. Both troops were of equal value and on the bridge there was no way of reinforcing them.

It was at this point we decided that the game had come to an end. The rules worked but the scenario was poorly designed. With the bridge the only method of crossing the river and my gun covering it, there was no chance of Alan taking the bridge.


The 28mm figures for this game were Bob's Irregular Miniatures ECW figures, to which he added Warlord’s TYW range. All the  ECW figures, about 300 of them, were based for an excellent set of 18th century rules King of the Battlefield.  These used 3 bases for an infantry regt or a cavalry unit. I use 3 x 4 infantry and 3 x 2 Cavalry. This game used P&S rules which uses bases and does not care how many figures are on a base.

Most units have oversized flags – the Swedish and German flags are enough to change the ECW figures into the two TYW armies. There are odd conversions such as the leading Cuirassier charging across the bridge who has a cape made from a cigarette paper covered in polystyrene glue added. Perhaps more interesting are the gun crew – one is a pirate, another a Border Reiver and the last a Celt! They seem to work and neither Jack or I has ever commented on them (might notice now).


The militia whom Bob successfully drove off the field are the Perry’s Russian Napoleonic peasants. The first set of 6 have hand weapons and the second 6 captured firearms. The only figure that doesn’t fit with the 17th century is the officer who wears a Potemkin, Bob also uses the peasants with my Napoleonic Russians.