Showing posts with label Kitten Force. Show all posts

Sunday, 22 January 2017

Crimean War Black Powder Game

Bob, Jack and I met for our first game of 2017, a Crimean War Black Powder game based around the Battle of Alma scenario in the rule book.

The rules suggest a 9'x5' table.  I have 8'x4' and the unit numbers we used were smaller so with a bit of messing about it sort of worked from an initial dispositions point of view.  We also reduced movement and ranges to 50%.  

All the figures are Minifigs S Range originals or recasts together with some of my own conversions.

The British initial dispositions

Scots Brigade
  1st Light Brigade
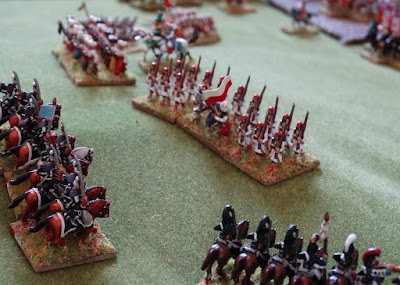
Guards Brigade
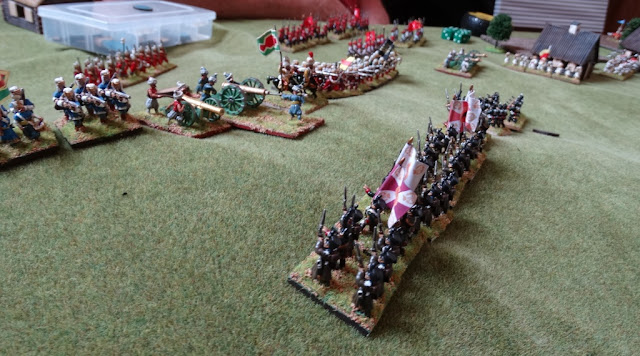
 The Russian positions

Russian small redoubt 

Large redoubt

Russian Centre
  

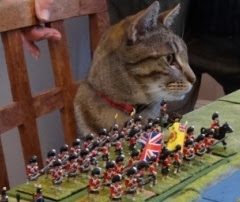
 Jack and I were going to command the British and Bob the Russians.  However I was quickly substituted by 'the Duke' (half of Kitten Force - or Brute Force as they are going to be renamed given their size now!)


Jack gave him charge of the Scots and Guards Brigades.  The Duke them went on a recon mission including trying to intimidate the Russian's C-in-C.


Having had a further look and passed on his finding, the Duke retired and the game started in earnest.

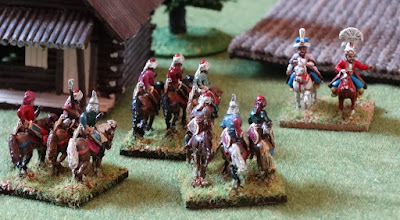
Basically, the Russians are fighting a defensive action and there wasn't much for Bob to do except decide when and where to bring on this 2 brigades of cavalry who were off table..  


So I took the initiative and advanced my Brigades.  The Guards got off to a slow start.


Bob moved one of his 2 Cavalry Brigades consisting of 2 regiments of Cossacks and 2 regiments of Light Dragoons onto the table to the right of the large redoubt.  As a safety measure I moved both of my regiments into squares.  We debated in fact whether given the British were armed with Minnie rifles they would have bothered and whether they would have just shot the Russians away.


I moved forward the Heavy Brigade and with 3 command moves they raced across the table towards Bob's cavalry. 


The Light Brigade brilliantly rolled a double 6 and took a 'Blunder Test'.  Fortunately,  it resulted on one move to the left, not so desperate!

Bob's guns started to take their toll with hits on the Rifle Battalion who were in a square and on the advancing British Guards


The Heavy Brigade took the initiative charging into the Russian cavalry. The Scots Greys ripped into the opposing Cossack unit causing them to break whilst the Dragoons could only pull off a draw.


The damage had been done with the Cossacks breaking and the supporting unit also having to fall back. The Scots continued their sweeping advance hitting the light dragoons, pushing them back and off the table into oblivion!

On the left Bob's other brigade appeared........


.......threatening the Guards.


Despite this, things looked to be going quite well, my artillery were starting to counter battery the Russian guns in the small redoubt, managing to inflict casualties and disorder on of the guns.

But Bob took the initiative and brought forward his Russian columns to inflict punishment on the Scots Brigade. He managed to flank them ....


they held despite overwhelming odds but eventually one battalion broke and fled the field.


In the meantime the Light Brigade managed to save the day by sweeping across the table and crashing into the rear of the flanking Russians and the rear of another regiment. These 2 Russian regiments performed heroically managing to survive the first Break Tests


The Heavy Brigade took some heavy punishment from the infantry regiment in the large redoubt with the Scots Grey's being wiped out. But my infantry charged forward and thanks to some very pour closing fire swept into the redoubt.  The Russian Infantry were distracted by the heavy cavalry who rallied and charged. The Russian infantry failed to stop them and combined with the infantry assault suffered horribly as a result.


At this stage, with one gun in the small redoubt still firing and his other cavalry brigade in tact we call it a partial victory for the British.  For my part whilst I had some good results, I felt that the table edge end of the world was a real problem for the Russians.  There also wasn't a lot for Bob to do except roll dice which, to be fair, didn't go well for him and probably contributed to my partial victory.  

The scenario/game gave high command thresholds to the British which meant I was able to move and command my troops better than the generals of the time.  The problem with a low command threshold, which might have reflected the quality of generals at the time - certainly the British - would probably have meant long periods of inactivity as we tried to get scores below 5!

Anyway, it was nice to get the figures out. The redoubts were homemade with air dry clay, coffee stirrers and Perry plastic gabions.  For the eagle eyed, the Priest in blue blessing the Russians is a not so good conversion I made from a Russian Guard Infantry Officer. I am going to remake this and am determined to do better!




Tuesday, 16 August 2016

15mm Napoleonic Ottomans and Russians A Black Powder Game

One of the most popular posts on our blog are the pictures I posted last year of my 15mm Napoleonic Ottoman Turks.  I have added a few extra units so Bob and I decided to give them an outing against my 15mm Warrior Miniatures Russians, who have also gained a few extra units.

The scenario, if that what you can call it, is that the Ottomans hold two hills and the Russians aim is to force them off the high ground.  The Russians are not fully deployed and their infantry are cresting a hill themselves before being able to deploy in the centre.  The Russian cavalry brigades have deployed to the left and right with their supporting horse artillery.

As always I try to start of with a bit of a strategy.  In this case it was to send my cavalry in large numbers to drive the Ottomans off of one hill and to them swing my Guard Cavalry brigade into their right and sweep them away whilst at the same time launching a large infantry assault on the main Ottoman infantry.  Well that was my plan anyway.  Here's what happened.

The Ottoman positions:

The left wing.


Albanian, Egyptian, Anatolian Sekan  and Derbent infantry regiments supported by irregular cavalry, Sipahs and Suveri with Cossack and irregular cavalry skirmishing out front.


Ottoman right and centre consisted of Nizam-i-Jadid regiments and Janissaries including a Guard unit with guns and rabble infantry.


 The right was made up of  the Sultan's Guard and Djellis (both units Minifigs)


Supported by a brigade of heavy cavalry


The Russians deployed a large brigade of Dragoons with their horse artillery on the right.


and 2 brigades of light cavalry on the left - lancers and hussars.


In the centre the bulk of the Russian Infantry


Bob was on the defensive and unlike the last couple of games he somehow managed to stay like that- even through at heart, and with this much cavalry, he is a sort of Errol Flynn  'They Died with Their Boots On' (Go you Wolverines)  and 'Charge of the Light Brigade'  do or die cavalry commander.

In keeping with my original plan my cavalry advanced on the right towards the weaker of the two hills.  Some initial skirmishing with Bob Cossacks horse archers saw a first casualty on my Cossacks before they were driven off. 


The advance made room for the deployment of my Guard Cavalry brigade consisting of Guard Cossacks and Hussars and 2 regiments of Cuirassiers.


In the centre the infantry advanced towards the strongest Ottoman position with the bulk of their infantry and heavy guns.


My advance on the left started and stalled as I realised that having placed the overwhelming bulk of my cavalry on the right I was outnumbered by Bob's superior cavalry and defeat by them risked exposing my infantry! So my grand plan sort of stalled a bit but I was committed.


I blame part of this on Bob having found 3 odd 15mm figures from the early 1970s which he present to me at the beginning of the game.  One was a figure offering a bottle and food on a tray and this clearly distracted my General and the others were 2 ladies serving food equally designed to distract!  I think it is important to have an excuse prepared beforehand.


The other blame lies with 'Kingston' from Kitten force.  If he towered above my 25mm troops he was a veritable colossus on the 15mm table!


anyway back to the game......

The Turkish guns, although heavy, weren't doing as much damage as I had thought,  causing hits but not stopping my troops, except in one area where my infantry crested a hill they held in the centre.  In the case of one brigade as the reached the top the artillery stopped them and then next move knocked them back.


My massed infantry moved forwards with light infantry to the fore.


Bob reorganised his lines bring forward his Janissaries.


On the right I my horse artillery managed to drive off the other irregular skirmishing cavalry


Meanwhile my cavalry engaged the first of the Ottoman irregular cavalry as I tried to flank the Sekans on the hill.


Having learnt in our last battle that cavalry can't charge squares and not thinking that the Ottomans would have formed square anyway the Sekans stayed in a line passing morale tests. I am not entirely sure why I stayed back and didn't charge, but left myself open to a round of musketry. Fortunately it was hopeless.


 My Dragoons eventually showed their superiority and saw off the Irregular cavalry but bad dice made this more difficult than is should have been.


 At the same time the Guard continued to advance to take advantage of the work of the Dragoon brigade.  They made it past Bob's two ladies and their food etc.,


The Infantry attack was gaining some momentum, taking advantage of the dead ground created by the terrain to protect them from the guns.


The Ottomans waited with the rabble covering the Jannissaries.


On my left I got into all sorts of a mess not sure what to do, first halting my troops and them advancing.  

In the meantime Bob reorganised his cavalry and infantry to take advantage of my dithering.


Eventually after deploying my horse artillery to no real effect, I ordered a charge!


On the right flank my cavalry smashed into the Sekan's lines.


Making way for the Guard to swing around the flank as originally planned.


At last the Ottoman cavalry hoard began to move forward as their infantry fled


Back in the centre my light infantry went forward into the teeth of the enemy guns!


Only to leave one regiment shattered and broken.


 ...but still the next wave of Russians marched on.  Their supporting horse artillery which had caused little effect was picked off by the Janissaries.


In the cavalry engagement which supported the advance my lancers came off badly against Bob's Djellis and the Sultan's Guard defeated my Hussars.  I had to throw in my second brigade to stop and repel both units.


However, the situation was now dire as Bob moved forward his brigade of heavy cavalry on the right.. This meant my infantry in the centre would be in trouble soon unless I could make headway against the main Ottoman forces.  I eventually managed to get some massed musketry going, but the effects of marching under fire must have got to the infantry because it was frankly feeble!  1 gunner and a Janissary!!


the other light infantry regiment broke in the exchange of fire.

At this point we reached the stage that I suspect many off us do of analysing what was happening and what was likely to happen.  The Sekan brigade was gone and my cavalry held the second hill with the Guard now in a position to support.  The bulk of the Ottoman cavalry on that flank was still in good order and numbers were about even, but with the quality with the Russians.


In the centre my infantry were standing under the weight of artillery and Janissary musketry and although some of the Ottoman rabble had fled the field it was going to be tough to shift the rest.


On the right I had seen off some of the Ottoman cavalry but a full fresh brigade of heavy cavalry was readily available to take on my weaken cavalry.  If they got through them my infantry centre was vulnerable regardless of any progress they had made.

We both felt this would have been a point at which as Commanders we would have withdrawn our troops, reorganised them ready to fight another day.  

As always we got things wrong and couldn't find things in the rules which we subsequently did after the game (sorry but some of the layout in the BP rules can be annoying) which would have given, or might have given different results. 

Ultimately, the game looked good and we enjoyed ourselves and you can't ask for much more from a couple of hours of moving figures around a table.