Showing posts with label Naval. Show all posts

Friday, 24 January 2020

Battle of Chongzhou: - a mostly Jacklex 20mm game


When I first got my diagnosis of cancer and was given ‘months’ I thought it was time to have a sort out of the figures and down size.  Jack had made me a number of ships over the years which were really great but difficult to sell on line because of their fragility and subsequent packaging.

I contacted gamers who I had been in touch with over time to see if they were interested in the models and more importantly could they physically collect them from my home.  Payment was a voluntary contribution to Cancer Research UK of what they thought the models and figures were worth.

One gamer Richard Wells came up from Kent to collect some ships and other bits and I have stayed in touch with him and his progress towards getting his table sorted out.  I am delighted to say that the models have finally hit the table and Richard has kindly sent me some pictures and a description of his game which he has agreed that I can post on my blog.

So I give you the Battle of Chongzhou:


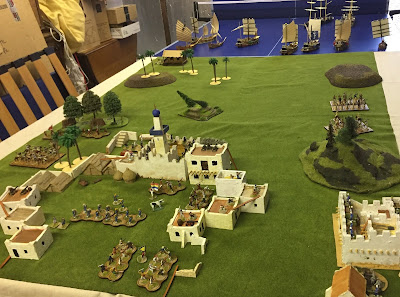
A British force under the command of General Wells were instructed to relief a German and French force, running out of supplies and tied up in a fort next to the River Sonlung very close to the Chinese held town of Chongzhou.


First the much larger Chinese navy had to be defeated, before a dangerous landing could be attempted. The British navy consisted of HMS Daring and HMS Endeavour and a machine gun armed launch. Against them were arrayed 6 Chinese junks and 3 smaller dhows. Alas the Chinese navy proved no match for the much better armed British boats and after some extraordinary dice throwing the entire Chinese fleet was sunk in 3 moves, with very little damage to the British ships.


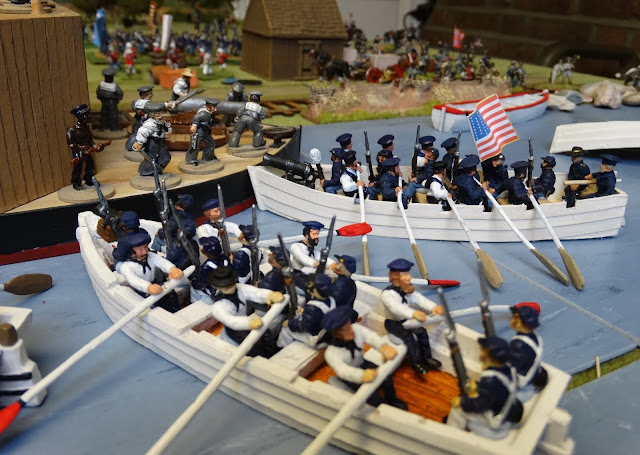
Landing boats with the Marines were then launched to make a bridgehead.


The Chinese commander  General XunTsu realising it was imperative to stop the landing sent all his cavalry and a unit of boxers to drive the Marines back into the sea before they could establish the bridgehead.

Richard's son Sebastian looks on as the Marines land.

The Marines and their Gardner gun only had time to clamber out of their landing craft and fire one volley before they were hit by the charging Chinese cavalry. That one volley managed to sweep away nearly half of the Chinese cavalry at close range but the charge was carried through and the Marines were beaten back into the sea, although they caused much damage to the cavalry, which was also forced to retire and re-group.


Two Highland regiments were fast approaching the shore, while the Boxers were closing in on the beach. The Marines in a dis-organised state were driven back a second time into the Scots whose firepower made some holes in the Chinese attackers. The Scots managed to land and the Boxers after one round of fighting fled.


Meanwhile the Germans and the French, despite being low on rations decided to launch their own  attack on Chongzhou - a risky operation at best. Chinese fire from the perimeter houses was highly inaccurate, as it was prove to be throughout the battle. The French and Germans fought their way through the houses forcing the Boxers into the open, but they had not realised that a unit of the crack Tigermen were waiting on the other side. These charged forward and despite loses forced the French and Germans back with their own heavy loses.


The patrol boat that General Wells had sent up the muddy river was now approaching the fort and relief was at hand. The British infantry started their advance on Chongzhou with a regiment of cavalry in support. The Navy’s ships poured fire into Chongzhou taking a particularly heavy toll of the Chinese gunners and guns on the battlements.


The regrouped Chinese cavalry decided to give it one more go and moved forward to meet the British cavalry. In a battle that seesawed backwards and forwards the British Cavalry eventually got the upper hand although both Cavalry forces were forced to regroup after 2 rounds of combat.


A small force of German snipers who had been ashore on the right side of the battlefield had now advanced within range of the town’s fortifications and started to lay down a withering fire.


While the Germans and French were fighting in Chongzhou, a small group of Chinese attacked the fort and one of them managed to force his way in killing the last French soldier.


Unfortunately for him the naval launch had by now arrived at the fort and it’s commander plus one rating confronted the Chinese and killed him after 2 rounds of combat.


Things were looking grim for the Chinese commander, so he decided to launch an attack against the German snipers


 His artillery were hopelessly inaccurate and were starting to take hits from both the naval launch’s machine gun and the approaching British infantry as well as a well placed German artillery piece which was firing from the fort. The Chinese stormed out and managed to finish off the remaining Germans before turning their attention to the Navy’s Gardner gun, which had started raking the city’s battlements. Despite taking what they thought was good cover they were mown down by the Gardner gun in two rounds of deadly fire, failing to score a single hit themselves.


General Wells now decided to go for the kill and sent his remaining Cavalry and himself up to the City’s main gate, armed surprisingly with previously unknown explosives. They received casualties from the Chinese defenders, but were able to lay the charges and then detonated them successfully. The Chinese commander realised the situation was now utterly hopeless and was forced to surrender.


I think we will be having a review of the rules next time to ensure the allied force do not have too many machine guns and artillery as these were an overwhelming factor in their victory. Although this was combined with some exceptional rifle fire by the British and a worse than expected performance by the Chinese infantry. In hand to hand battle they generally did quite well, but in a gun battle they were beaten every time.

However, it was a very enjoyable game and the buildings looked magnificent.

Most of the British figures are Jacklex 20mm available from Jacklex Miniatures  https://www.jacklexminiatures.com/ .  The Boxers are mainly plastic figures from Orion, there are also some 20mm metal figures, including the Tiger Men but the make is unknown. 


Sunday, 8 December 2019

28mm ACW - A little bit of Everything Game

Well finally felt well enough after Chemo treatment to try our 28mm ‘everything in the pot ACW game’  I took a lot of pictures and I am afraid that you will have to suffer a lot of them. Sorry.  It also represents the last game on my big table in my loft - all dismantled now.  Five flights of stairs in a Victorian London Terrace are proving more of a challenge! Still aim to carry on gaming for as long as I can but will use the dinning table instead.  Also means Jack can join in as the can't do the loft!

Given the Confederates entrenched positions and knowing how difficult these had been to take in other games using Black Powder, we agreed that the Union forces should be further reinforced by another Brigade of 4 regiments of infantry.

The Union forces started with an all out assault Bob relying on speed to try to get to the Confederate raider before she could escape.

The Union cavalry charged forward catching the militia unit guarding the herd.   This was a freshly raised unit and the sight of the Union cavalry struck terror into them only giving them a chance to hit anything with a roll of D6.  Needless to say they missed and were cut down by the cavalry and the herd scattered.  However the gunfire alerted the Confederate forces.


Across the rest of the front the Union infantry hesitated and didn’t make great strides towards the Confederate lines.


On the river the Confederate patrol boat suddenly discovered it was being pursued by 3 Union boats .  Not something I was expecting.  Shades of the Oxford and Cambridge University Boat race.   The Confederate boat couldn’t pull clear enough to turn around to use it’s gun and I just had to keep going towards the raider hoping all the time that Bob’s ships guns wouldn’t sink me!


Whilst this was going on, unaware of the river threat, the main gun on the raider was being loaded and turned to face the threat of the advancing union infantry. 


It was only a lucky shot from one of the Union bow guns that disordered the raider’s gunners that alerted then to the real threat.  In the meantime they had managed to score a direct hit on the 30th New York infantry forcing them to badly fail a Break Test and leave the field.


With his cavalry largely unable to advance further because of the Confederate defences, Bob decided to dismount first one regiment and then the other and engage in a fire fight.  This pinned the confederate forces.


Whilst the raider then reloaded and turned its bow gun to deal with the river boat threat, the rear gun was loaded and turned to face a now growing infantry threat.


Panic was being to ensue on the raider all attempts to get the boilers going were failing and the crew were rushing to try to ward off the advancing Union flotilla.


The noise of the Union light ships guns alerted Col Jackson of the 47th Alabama whose regiment was engaged in a fire fight with the Union cavalry.  Unable to leave the defences, he sent half his men to the river side to fire at the passing Union boats to try to disrupt them.  They managed to Disorder one reducing it’s speed by half whilst the rowers got their act together.


In the meantime all attempts to roll a D6 to get the slaves to revolt were failing but the Union troops kept advancing.  A fresh Confederate Regiment came off the train to prepare to take up position.  Whilst it proved impossible me throughout the entire game to roll any sixes to restart the train’s boiler, I did manage one six to get one of the 2 raiders boilers fired.  I just needed one more six to get the other one going and smash through Bob’s boats!


The Confederate Marines rushed to try to fill the gaps in the centre of the line.


Whilst the defences meant that the Confederates were taking little or no casualties, Bob’s Union force pushed on across the entire front preventing me from moving troops.  Soon the Union the forces had moved to close range and it was only a matter of time before they hurled themselves at the defences.


The final assault came all along the line.


On the river the slower of the Bob’s Union boats found itself exposed at close range to the raider’s main gun.  Needless to say it didn’t survive!


But it was all going horrible wrong. Everywhere except on the one section of defence’s left hand side my forces were pushed back in melees.  Not only did the Militia unit hold, they forced back the 1st US Sharpshooters, and seemed to be doing well against the 80th New York (with the smart yellow flag).  Then it happened! A D6 and the slaves seeing how close their saviours were decided to get involved! One shot and a lucky D6 was all it took to disorder the Militia and the 80th were over the barricade and getting to work. 


There were odd success but not enough one Union regiment was through back , but another took its place.


Worse still the union boats drew alongside the Raider and their crews engaged in hand to hand fighting with the crew on board.


Whilst the crew were rushing to try to see off the river threat a gap occurred in my line which I couldn’t fill and although the Confederate Marines put up a good show against the New York Chasseurs.  Two of Bob’s infantry regiments stormed through the gap and found the undefended side of the Raider and it was all over!


My patrol boat rowed off up-stream to deliver news of the disaster!


For all of the odd bits and pieces I had put out on the table, the rules, with a bit of common sense, worked surprisingly well.  The Union would have failed without the extra Brigade and we allowed the river boats to up their ‘stroke rates’ on 2 occasions to be able to move 6 inches instead of three.  They couldn't reload when this was happening and could only fire every other go.

I never thought it would be so difficult to throw a D6 for the Train and Ships boilers.  We even thought we would change it in the course of the game, so you only had to get above the number on the next roll to help.  That of course was the only time we rolled a six!

It was great fun anyway and good to see everything out.  Jack scratch built the Church, the Rider and the Warehouse building, and some of the Boats.  He also made up the Black Hat regiment in one of the pictures.  The boat crews are from Britannia Models Napoleonic range which head swaps from the Redoubt Naval and infantry range with lapels and braiding cut away.  The union sailors are First Corp, Confederate sailors are Redoubt.  Almost all the other figures are Perry Plastics, with the exception of a few Haitians from Trent Miniatures and a few African Sailors from the Reviresco range.