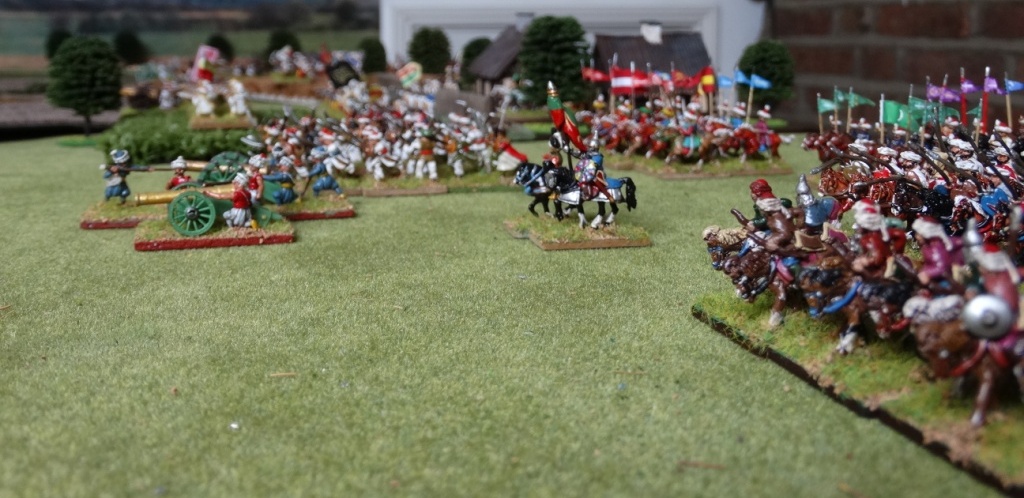
The combined Ottoman and Persian
forces have broken through the heavily farmed and wooded areas and have now reached the
open ground which allows their cavalry to exploit both their movement and
numbers. There objective to get one unit
next to the Holy Church on the hill the Russians aim is simple, don’t allow it
and inflict maximum damage on the combined forces.
Bob commanded the Ottomans and
Persians.
The Ottomans made up the centre and
left flanks whilst the Persians where on the right. The ‘army’ consisted of 25 units of Infantry;
20 units of cavalry and 11 units of artillery.
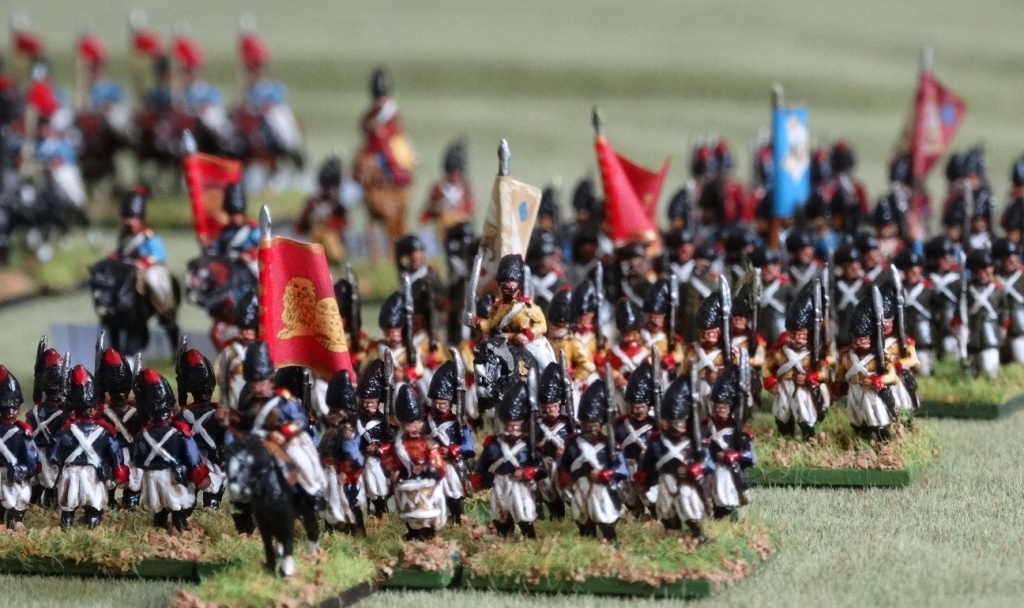
The ‘Allied Forces’


The Russians had 17 units of Infantry;
15 units of cavalry and 8 field guns and 3 batteries of horse artillery.
 |
| Holy Church is just visiable at the back of the picture |


Unsurprisingly, the ‘allied’ forces
took the initiative with the irregular light cavalry on both wings moving
forwards at a pace. The Janissary
Brigade moved forward in the centre. The
Persian artillery suffered a hiatus and stayed put.


Assuming it was a bit of a doodle because
of all the ‘dross’ cavalry I had added to the allied forces, I moved forward 2 batteries of horse artillery and a unit of Cossacks to ‘see them off’. As always Bob doesn’t seem to understand the
rules and attacked my guns and Cossacks!
The Cossacks were routed and the guns just failed to perform and were
overrun by the Caucasian lancers in a very brief engagement!


In the centre some decent artillery
fire and a Break Test saw the largest group of Ottoman irregular infantry turn
tail and run. I did wonder at this stage
whether I had wasted both time and money creating these large irregular units.

To see off the large bodies of
screening light cavalry the Guard Lancers and Guard Cossacks both charged. Amazingly, both proved to be useless. The irregular cavalry large unit plus 2 in combat proved to be
a decider and both units were forced to Retire. I had to spend 3 ‘Rally to
Me ‘ command turns to get them back fit again!


My Don Cossacks and a unit of
Hussars tackled a large body of Tartar ‘lancers’, eventually breaking them but
not before the Don Cossacks fled the scene.


On my left with my artillery and
Cossacks gone I threw in my light cavalry lancers and hussars and a regiment of
dragoons to stem the allied cavalry advance.


In the centre the Janissaries
engaged the Russian Infantry

Bob threw in his Ottoman Fanatics, the Russian infantry passed their Command test and stood to take on
the fanatical charge and managed to hold them.

Elsewhere in the centre a fire fight
developed with the Janissary brigade, preventing me from reinforcing my
infantry defending the Church.


Bob launched the European trained
Persian Brigade in a concentrated attack on the Russian infantry defending the
Holy Church.

At this stage things were looking
tight. My light cavalry on the right was in a bad way although I had my
3 regiment strong Guard Cuirassier brigade in tack, the Ottomans could still
muster 7 units which hadn’t been engaged to face them. However, my last horse artillery battery did
sterling work stopping one heavy cavalry unit which in turn blocked a following
unit.
On the left my cavalry were being
held or pushed back leaving me with one brigade of 2 regiments of Dragoons to
support the infantry near the church. A
notable exception being the destruction of one of the two Persian regular
lancer regiments.


The only saving factor was that the
irregular cavalry had a stamina of 2 which many of them had reached and not
enough commanders to rally them back into the game.
The allied high water mark came with
the breaking of one of the Russian Infantry regiments and the destruction of 2
batteries of artillery by one of the Janissary regiments.


However, this victory was short
lived. The fanatics were broken and fled
and a combination of infantry and artillery fire saw two Janissary regiments who
had given their all in hand to hand combat defeated.


,
When the Guard Janissaries threw a
double 1 in a break test it was all over and the Janissary brigade was broken
and left the field.


However things were far from over.
Bob still had a lot of fresh cavalry on the left and in the important centre
were the Holy Church stood the mass of European trained Ottoman and Persian
infantry were advancing steadily.


The Russian lines in front of the
Church looked thin and my attempt to move supports from the relieved left flank
to the centre failed. In fact, we both
realised later that a unit of Tartar horse archers could have won the game by
flanking my dragoons on the right flank and reaching the church, which was the
object of the game. Instead, they used
their 3 moves to ride up and along the front of the Russian infantry firing
their bows and then getting out of range.

More and more allied infantry were
now entering the fight but they struggled to take advantage of their numbers as
the Russian Infantry and guns took their toll and just managed to hang on.


The first Persian Infantry regiment
broke, them another


Soon followed by a regiment from the
Nizam-i-Jedid brigade and the Derbants on their right


I also threw in my remaining
Dragoons on the left to prevent any flanking attacks forcing 2 Persian regiments to form
square. Whilst my other unit took on and
blocked the remaining Persian lancer regiment.

With all the pressure from the
infantry on my right gone my guns were able to strike at some of Bob’s fresh
cavalry units forcing one to flee. The
‘rally to me commands’ having brought my two units of light guard cavalry back
to a serviceable level I was able to launch the Guard Cuirassiers to
devastating effect. With unit after unit of Ottoman cavalry being crushed under
hoof.


We played this game over two days as
at the end of day one it wasn’t clear what the outcome would be. The key factors that swung it in the Russians
favour in the end was the lack of artillery fire from the Ottomans and
Persians. They started out of range for
field artillery and could not get Command throws to move. When they finally did manage to drag
themselves within range their targets were blocked. Whereas, the Russians had a free hand to pick
off units at will even if they didn’t hit anything at times. Given that the Ottomans didn’t move their
guns about in the way we were trying to do I think I should have classified
their guns as siege artillery and given Bob the extra range. Still not brilliant but better than
nothing. The lack of Ottoman and Persian
commanders also meant that Bob couldn’t really afford to try ‘Rally to Me’
commands to get the various Irregular Cavalry and regular infantry back into
the game. On the one occasion he tried,
it failed stopping his entire left wing cavalry and infantry units at an
important part of the game.
The large irregular cavalry units
did work with the pluses proving crucial and effective in combat and the +1 on
the large bodies of horse archers making them worthwhile and a nuisance.
The bulk of the Russians are Warrior 15mm, with some Minifigs. The Ottomans are mostly Minifigs with some Irregular Miniatures, almost all the Irregular Cavalry and infantry are from Lancashire Games and the Persians are from Irregular Miniatures.