Tuesday, 9 August 2016

28mm Black Powder Napoleonic Game

Had a game at Bob's this week to try out the Black Powder Rules again, this time using Bob's French and Russian Napoleonic Figures.  The scenario was as follows:


French scouts reported back that a Russian force was advancing towards the only bridge and ford in the area. A mixed French force was immediately dispatched to take and hold the bridge and ford to enable artillery and supplies to continue their advance.

The French force consisted of:
2 Infantry brigades each of 3 regiments of infantry
1 Infantry brigade  of 1 regiment of infantry
1 light cavalry brigade of 3 regiments Chasseurs au cheval
1 heavy cavalry brigade of 2 regiments of Cuirassiers/Carabineers
2 batteries of horse artillery

Against them was a Russian force of:
3 Infantry brigades each of 3 regiments of infantry
1 light cavalry brigade of 5 regiments of Uhlans
1 regiment of Cossacks
1 regiment heavy cavalry Cuirassiers
2 batteries of horse artillery


Determined to take and hold the position.

Bob conducted operations for the Russians whilst I commanded the French.

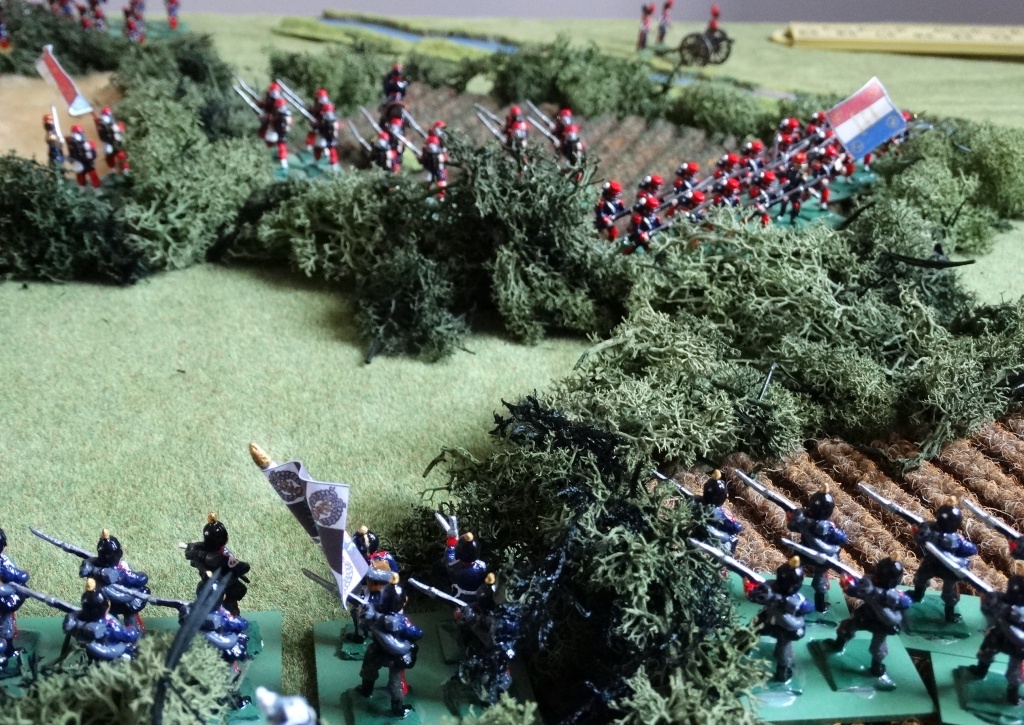
Some of my French forces


The Russians


Amongst the obstacles separating the two forces a 'flock of sheep'.


This is a really nice resin piece made by First Corp representing a flock of 50 sheep. It is grey and therefore only needs a white dry brush to make it quite effective.

Anyway back to the game itself...for those who have used the Black Powder rules, you will know the frustration of orders not being responded to.  Bob won the initiative and suffered badly from a lot of inactivity on his first move but some infantry did manage to get going.


I on the other hand was able to advance my troops and change formation ready for the Russians.


 an early round of artillery found it's mark on one of the Russian battalion causing it to stop.


The large mass of Russian cavalry (mostly dreaded lancers!) on my left flank finally got going and headed at speed towards my small heavy cavalry brigade.


Meanwhile in the centre and right an infantry fire fight developed with Russian infantry moving through the woods and fields.


Their advance brought them into a better range for my artillery which was supporting my infantry. Some good dice saw Russian casualties but their morale held


Meanwhile on my left the Russian cavalry struck home. One Cuirassier Regiment saw off its opponent causing them to break and run, but the other regiment suffered badly being all but wiped out.


 A brave and desperate follow up by the victorious regiment in an attempt to stem the flow of Russian cavalry was ill fated. Thus ended my cavalry brigade!


Faced with a threat of cavalry to the front and flank my infantry regiments formed squares. Sensing victory Bob ordered a regiment of Uhlans and another of Cuirassiers to charge the squares. 


Never having done this before we consulted the rules to work it out, only to find that cavalry charging formed square is not allowed unless the squares are disordered.  Having both seen Dino De Laurentitiis's 'Waterloo' and Ney's (Dan O'Herlihy) charge on the British squares depicted in the film whilst not 'impossible' it did happen (in real life and in the film) so we gave it a go to see what would happen. 


Basically the rules are constructed so that a formed square cannot fail to cause casualties on every dice roll (6 at a time).  So you need some very good saving throws to to survive. 

One square saw off and destroyed two cavalry regiments on the basis of these rules, but was left on the brink of breaking (probably a good reflection of reality).  A third cavalry unit would definitely have broken it but the waste was enormous.  However, having experimented we put the cavalry back were they started and carried on as if the charge had not happened.  

With all the Russian cavalry movement on the left a gap appeared between the Russian right and centre and I sent forward my cavalry to try to take advantage of it, create a threat and stop the Russian having a free for all on the left.


Bob's Russian artillery were out of position and screened so they set off to try to have an impact elsewhere on the battlefield.


The French artillery were having a field day in every sense of the word.  Having stopped the Russian brigade, they drove off one regiment causing it to break and run, leaving a gap in the line, but by now there were no French cavalry in any position to take advantage of it.


The French cavalry turned to take on their Russian counterparts.  This was always going to be something of an unequal struggle with light cavalry pitted against the remaining Uhlans, but in they went.


Bob's cavalry ultimately won, but enough damage was caused to them to prevent them exploiting the gaps caused by his early victory over the French heavy cavalry.  It also relieved pressure on the infantry squares who were able to reform under a cavalry screen.


More infantry fire on the right saw one of the French regiments fail a break test and leave the field. With the other two regiments weakening as well. the remainder of the brigade withdrew behind the next line.


Bob looks on delighted at his infantry firing.  The local peasant continues to harvest the corn regardless of all the bullets flying around!


The game ended more or less with honours even. Fortunately, apart from the odd failure to move we didn't have a repeat of an entire brigade not moving for the whole of the game which help the enjoyment.  It was good to try out the 'Square' rules in the middle of the game.  It shows the need for artillery or infantry to be close by, which mirrored the reality of the period and also that if you really were desperate and had enough cavalry you could break a square but at a high price. 

Friday, 5 August 2016

Crimean War Sardinian Provisional Cavalry - S range conversion.

Another of my conversions for the Crimean War S range series.

I had always fancied some Sardinians to compliment my allied army and the original S range figures listed in their catalogue seem illusive, assuming they were ever produced.  So I set about creating some conversions.

This is my attempt at a Sardinian Provisional Cavalryman.


It is basically the French Chasseurs a Cheval figure with a large (and long) horse hair plume added.  The Sardinian cavalry seem to have worn trousers.  I just painted over the boots and it sort of works, but I should have filed the boot tops away. 

The figure is painted as a trooper of the 2nd Squadron of the Sardinian Provisional Cavalry (Aosta).  The Provisional Cavalry squadrons have different coloured kepis.  For more information see http://www.ottoman-uniforms.com (Crimean War Sardinian Army).

 This figure is available from John Cunningham as part of his Crimean War Range.

Wednesday, 3 August 2016

Crimean Mounted Scots Officer - S range conversion

This is one of the conversions I have done to allow my Crimean War Scot's Regiments to have mounted officers.  


It is my usual head swap method shown elsewhere in the blog.  Highland Officer's head on the mounted British Officer's body and some 'greenstuff' for the tartan shoulder roll (I am sure this probably has a correct terms, so my apologies in advance).  The boot 'line' is shaved away to allow for trews.

John Cunningham now has this figure available as part of the Recast Crimean War S range

Friday, 8 July 2016

FPW S Range Black Powder game

Having more or less finished my Prussians and allies and a couple of true S range Franco Prussian War French units, Bob and I decided to try the figures out using the Black Powder rules.  These are a mix of the original figures and a lot of the Recast 25mm S Range figures which are available from John Cunningham.

The French consisted of 4 Infantry Brigades each of 2 regiments (they are a mix of Crimean and Franco Prussian French figures).

  1. Guard (elite) and Zouave regiment (skirmishers/sharpshooters)
  2. Marine and Chasseur regiment (elite/sharpshooters)
  3. 2 Line regiments
  4. 2 Line regiments
1 Brigade of Light cavalry, 
2 light guns and one Mitrailleuse

The Prussians had 3 Infantry Brigades 

  1. 3 regiments of Prussian Infantry
  2. 1 regiment of Bavarians and one of Silesian Rifles (skirmishers/sharpshooters)
  3. 2 regiments of Wurttemberghers
1 Brigade of 3 units of Light Cavalry
1 Brigade of 2 units of Heavy Cavalry 

2 guns ( 1 Heavy and 1 light).

The Prussian front lines at the start of the game.

Heavy cavalry of the left flank and Light cavalry on the right


Looking from the French Lines


The terrain was broken by fields and hedges (bits of carpet and moss!)


Since neither of us had much affinity for either of the protagonists, Bob choose the French leaving me with the Prussians.  I had anticipated that Bob would wait for me to come onto his forces given the extra range of his rifles but no, the French 'elan' came to the fore and he advanced his units (where possible).  I came forward to close the gap.


My guns made ready to open fire having a longer range than their French counterparts.  All the guns on both sides either missed or the casualties were saved!


The Guards and Zouaves took up position on the crest of the hill facing the Wurttemberghers.


The French settled in the hedgerows and proceeded to take shots at the Prussian (not very successfully) before the range closed. The French Chasseurs crossed the stream to add their firepower to the French Line Infantry, taking advantage of the re-roll on a missed shot to inflict casualties of the Prussians.


In response, the Prussian brigade formed a firing line and were, eventually after a couple of failed commands, supported by the Light Cavalry Brigade which threatened the French left flank.


The Wurttenberghers meanwhile climbed the slope to confront the Zouaves.  They were supported by a Bavarian light gun which might have well have stayed in the melting pot.


After much standing around the Bavarians and Silesians decided to advance towards the flank of the Zouaves. The French gun brought up to support the Guards and Zouaves and it was as equally useless as the Bavarian one!


The Guards watched on.


The Mitrailleuse, support by 3 ladies, also watched and waited for the enemy to come within range, which an unfortunate Wurttembergh regiment eventually did!  In these rules, you roll one dice and keep going until you miss.  4 casualties later and the Mitrailleuse finally stopped.  This forced a command test which the Wurttembergers passed only to get a halt order.


Bob sensing the opportunity presented by the stalling of the Wurttembergers brought up his light cavalry brigade to support the Guards.


With all the 'elan' they could muster, and to my surprise the French Infantry charged into my Prussian regiment. The Prussians failed to stop the charge with their volley and a melee ensued.  The French already had a couple of casualties from earlier rounds of firing and lost the melee, breaking and leaving the table.


The Marines on the French left flank in response to the advance of my Light Cavalry reversed their flank and brought up another light gun.  The first casualty of the Bavarian Light horse toppled over! 


The Mitrailleuse opened fire again not as successful but still enough to see off one Wurttembergh regiment. It wasn't enough as by now the Zouaves had come under fire from 2 regiments and broke.  Their place was taken by the Guards who also found themselves out gunned and retired, covered by their cavalry. 


What are hear you ask of my Heavy Cavalry Brigade?  What indeed!  Having failed order after order they finally advanced on the last but one move.  It was enough to put off the French Light cavalry, but not enough to stop a final round from the Mitrailleuse taking down one of the lancers!


The Prussian held the field at the end of the game with the French withdrawing. 


 One French Brigade didn't move for the entire game as they failed their command orders repeatedly.  I know this is in line with the rules but it is a waste of time, paint and lead.  I think that in future we may limit the number of times a unit can continuously fail to move, to perhaps twice or three times? After which it can make a single move before retesting again in the following turn?

It was great fun seeing all these S range figures on the table (over 300 infantry and cavalry) they do not match up to current figures, but as I have said before they have a charm all of their own.