Bob sent me a scenario for our
latest game of Turks and Austrians based in 1700:
My
Lord
The
Turks under the traitor Oglu Mikhail have devastated Neu Hirschdort
And have now camped in the valley. However
Oglu Mikhail has dispersed his army to ravage and loot the surrounding
territory, and for the first time in years he has made himself vulnerable to
our forces. While he still has Janissary regiments the rest of his guard is
made up of light, irregular infantry and cavalry.
This
force could be matched by our local forces, all of whom are regular trained
troops and more than a match for the Akinjis and Azabs.
This
situation will not last and I urge your Lordship to attack while the odds of
reaching and killing the cursed traitor Oglu Mikhail - this may be our only
chance for the foreseeable future.
The Neu Hirschdort valley is wide and bordered by hills. Oglu’s
camp is in the centre at the rear.
I have assembled a force for your lordship
consisting of
3 brigades of regular infantry each of 2
regiments
1 brigade of Dragoons consisting of 2
regiments
2 brigades of Horse each of 2 regiments
We have no artillery ready but neither do
the Turks.
All are trained regulars, a match for
Janissaries and superior to the irregulars.
Your Brigadiers await your disposition so
they can be ready to move as soon as you arrive. If you send me your orders I
will issue them to your officers.
We all await your arrival so we may destroy
the Turks and kill the traitor Oglu.
Jakob Schweinfeld
Garrison Commander
Pferdbach
Couldn’t resist the challenge and we haven’t been able to get a game in recently, I’ve been renewing our deck in the garden and Bob is stripping wall paper!
Couldn’t resist the challenge and we haven’t been able to get a game in recently, I’ve been renewing our deck in the garden and Bob is stripping wall paper!
I commanded the Austrians. To reflect their better status each brigade
commander was ranted as 9. Whilst the
Turks had one commander with a rating of 7.
Austrian forces.
All my cavalry was on the left flank and made up of a 2 Brigades of Heavy Horse and one of Dragoons. For whatever reason the dragoons found themselves between the Heavy Horse and the infantry.
All my cavalry was on the left flank and made up of a 2 Brigades of Heavy Horse and one of Dragoons. For whatever reason the dragoons found themselves between the Heavy Horse and the infantry.


To the right of the cavalry were my infantry advancing in 3 columns.


The Turkish Forces
Bob’s Turks were in a more defensive position with the traitor Oglu Mikhail and his bodyguard posted in the centre with his camp and light cavalry on both flanks.


The camp was represent by a ‘resin’ tent made by First Corp. To make it more interesting Bob applied gold patterns.
They look quite non-descript and you sort of convince yourself that they must be ‘eastern’ and well painted. In fact they are gold coloured nail art available very cheaply on eBay or other outlets. Very clever and rather smart.
They look quite non-descript and you sort of convince yourself that they must be ‘eastern’ and well painted. In fact they are gold coloured nail art available very cheaply on eBay or other outlets. Very clever and rather smart.


Anyway back to the game.
Clearly my object was to move as
quickly as possible and take the centre and capture Oglu Mikhail.
I ordered my infantry to advance. Unfortunately, only one brigade got the message!

My cavalry at least responded moving
forward to deal with the threat of the light cavalry and a unit of heavier
cavalry and their supporting infantry rabble – not such a rabble as we will see
latter on. My thought being that I would
see these off and turn my cavalry onto the flank of Bob’s Janissaries and roll
up the flank.

Bob managed 1 move and advanced his
light cavalry on both flanks, together with the unit of heavier cavalry,
supported by the levy archers and spearmen on the flanks


A further series of command moves saw
the whole of my Austrian’s advance I moved my right flank infantry from columns
to line, extending the front to counter the advancing light cavalry.


My advancing infantry opened fire on
the Bob’s levy spearmen to the front shaking the unit, only to see them easily
past their break test. My infantry in turn took fire from the Janissaries archers causing them to become disordered.

My heavy cavalry launched a charge plunging into Bob’s levy archer’s. The obvious thing would be for troops of this type to run when faced with pounding horses coming towards them. We couldn’t find anything that would make them test in anyway and of course these types of troops don’t know the meaning of ‘form square’. So we just thought we would see what happened. The archers gave closing fire and disordered my cavalry. Who in turn failed to save their casualties. They closed to melee and scored more hits on the archers. However, the archers had more supports and as a result ‘won the melee’. We both felt this was an odd outcome.

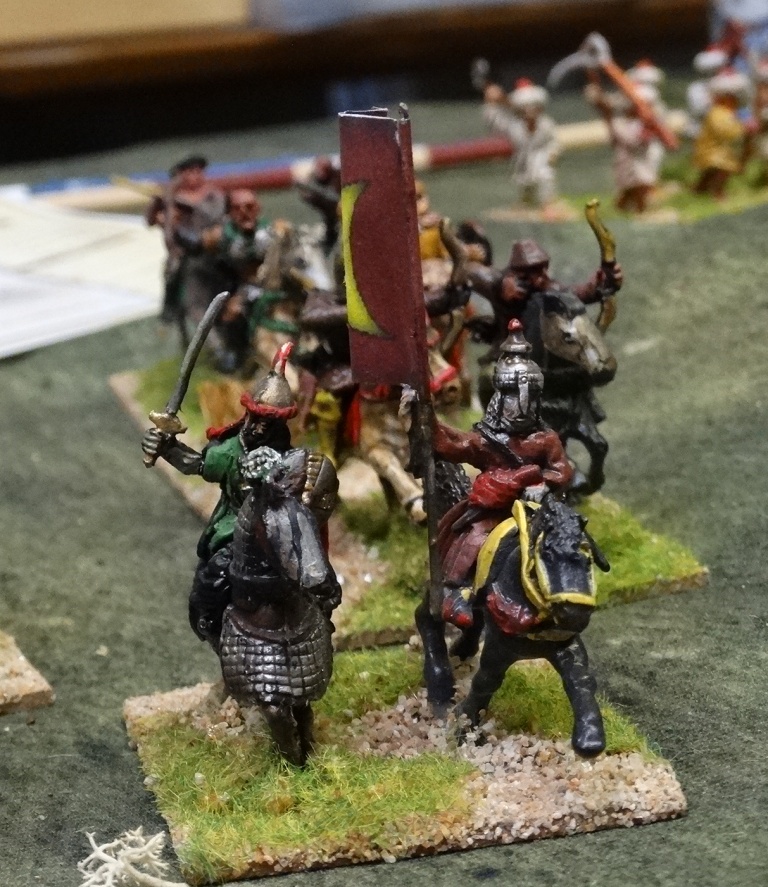
In the meantime my other cavalry brigade hit Bob’s heavier cavalry. Bob likes all medieval eastern European troops and in 1994 I went to Poland as part of a local government delegation. In a small shop in Warsaw I saw a 25mm Polish cavalry figure, with not much else to spend by 33,000 Zloty to the Pound (those were the days. 4.77 to the £ now), I bought it. Jack made Bob a mould and he now has a couple of units. A very simple figure but with flags/lance pennants they look quite handsome.
All that being said they didn’t last very long, losing the melee and failing their break test and fleeing the field.

The light cavalry supporting them retired eventually leaving the field.

In the centre, my infantry were still recovering from disorder, hitting the levy infantry - who continued to defy the odds and pass yet another break test - only to be plunged back into disorder by the Janissary archers. In an event to break the deadlock I advanced and dismounted my dragoons to draw off some of the archery fire and in turn try to inflict some damage on Bob’s better troops


On the right I saw off one unit of skirmishing light cavalry and advanced my infantry brigade through the woods to pour fire on the other unit of Janissaries that had been stopping my advance in the centre.


On the left, having lost the melee my heavy horse were obliged to retire. But having recovered from their disorder I ordered a charge on the Janissary archers who no longer had any cavalry cover. They suffered in the closing fire and melee and with the casualties from the earlier engagement broke and fled. They did inflict damage and the Janissaries were in turn forced to retire.


In the meantime, having seen off Bob’s cavalry my other heavy brigade hit the remaining levy troops, driving them from the field. All I had to do was get them under command and turn them to smash into the flank of Bob’s infantry.

In the centre my efforts to draw off the archery worked and my central infantry brigade was able to advance. Oglu Mikhail and his body guard looked on as the spear armed levy
finally fell back, leaving only his guard infantry between me and my prize.

Better still I managed to inflict some casualties on the guards with my infantry and disorder them.


In response, I sent in my last regiment of heavy cavalry which was responding to orders.
Finally I managed to roll something for my Heavy Cavalry on the left to respond to! A double six blunder roll! This sent them off to the right for one move.

In an effort to regain the initiative my dragoons charged the disordered Janissaries to their front.

My Heavy brigade finally got their heads around what was happening and made a double move towards Oglu Mikhail encampment.

At the same time one of my infantry regiments emerged from the woods to threaten Oglu’s right flank.

Seeing what was happening Oglu and his mounted bodyguard made a swift exit. A passing shot by my infantry failed to inflict and casualties. I failed to capture Oglu himself but his forces were - not surprisingly - defeated.


An enjoyable game and on the whole
the rules work fairly well. We both felt
the levy were too good. In theory they
should have run away at the sight of the heavy cavalry coming towards them or
at least have taken a Break Test to see if they would hang around. As usual we missed things in the rules and
forgot to move troops in the ‘heat of battle’.
Bob’s levy spearmen just wouldn’t break thanks to some excellent dice
and my central brigade kept getting disordered which was frustrating. But a good couple of hours and nice to see
these troops on the table again.
The Austrian foot and cavalry are Hinchcliffe except for 2 units of plastic regiments by Wargames Factory my central brigade which had some much trouble!).
The Turks are a combination of Irregular Miniatures; Redoubt; Essex; Lancashire Games and others.
The rather impressive unit of 6 standard bearers are the Polish figures mentioned elsewhere, but the standards which really make the unit are by Wargames Design.
Fantastic collection of figures, thanks for sharing the pictures with us, they're really inspiring!
ReplyDeleteHi Brian
ReplyDeleteMany thanks for your comments and taking the time to post them, very are very much appreciated. Glad you enjoyed the write up and pictures.
Somehow I missed this post till now. The 18thC Austrian/Russian Ottoman wars do not get enough tabletop attention. Hard to understand when you see a game which looks as good as this and was hard fought as well! (Now I am feeling nostalgic for my 15mm 1790's Russo-Austrian and Turkish armies!)
ReplyDelete